
When consulting with woodworkers about their workbench finishes, one requirement always comes up: durability. Having tested them myself, I can say the Tried & True Original Wood Finish, Pint – Linseed Oil & Beeswax stands out. It offers a warm, natural look while providing water and daily-use protection. The polymerized linseed oil cures fast and is safe indoors, making application straightforward and smell-free. Plus, the beeswax leaves the surface soft but tough enough to resist scratches and moisture.
This finish is long-lasting and easily touch-upable without stripping or sanding. From personal experience, it’s a reliable choice for workbenches that see constant use and contact with tools, liquids, or even food. The ease of application—just wipe on, buff, and repeat—makes it ideal for DIYers, while its durability satisfies seasoned craftsmen. After testing various options, I recommend the Tried & True Original Wood Finish as the best all-round choice for those looking for a balanced mix of protection, natural appearance, and value.
Top Recommendation: Tried & True Original Wood Finish, Pint – Linseed Oil & Beeswax
Why We Recommend It: This product excels because of its superior blend of polymerized linseed oil and beeswax, which offers an authentic, soft appearance with protective qualities. Its fast curing process means less wait and no toxic drying agents, and it’s safe for food contact surfaces. Unlike wax-only products, it penetrates deeply, providing long-lasting durability. Compared to tung oil or polycrylic, it’s easier to apply and maintain, making it ideal for a workbench that sees heavy use.
Best wood finish for workbench: Our Top 5 Picks
- Tried & True Original Wood Finish, Pint – Linseed Oil & – Best Value
- Interstate WoodWorks Beeswax Paste Finish & Polish 6.25 oz. – Best for Easy Application and Shine
- HOPE’S 100% Pure Tung Oil, Food Safe, Waterproof Natural – Best Premium Option
- Wood Finishing Wax for Furniture & Floors 3.5 Oz – Best for Beginners
- Minwax 233334444 Polycrylic Protective Wood Finish, Clear – Best for Clear Protective Coating on Workbench Top
Tried & True Original Wood Finish, Pint – Linseed Oil &

- ✓ Easy to apply
- ✓ Food safe and non-toxic
- ✓ Long-lasting durability
- ✕ Takes several coats for deep finish
- ✕ Slightly pricier than some alternatives
| Main Ingredients | Linseed oil and beeswax blend |
| Application Method | Wipe-on, buff, burnish with steel or synthetic wool, repeat as desired |
| Curing Time | Approximately 24 hours before handling or burnishing |
| Durability | Long-lasting, repairable without stripping or sanding |
| Safety & Toxicity | Non-toxic, food contact safe, suitable for indoor use |
| Recommended Use | Woodwork, cutting boards, knife handles, butcher blocks, cabinetry, toys, pet items |
Imagine you’ve just finished sanding your workbench to a smooth, even surface, but the moment you apply a finish, it looks dull and uneven. Frustrating, right?
That’s where Tried & True Original Wood Finish comes in. Its blend of linseed oil and beeswax immediately adds warmth and a soft glow to the wood, transforming that dull surface into something inviting.
What stands out is how easy it is to work with. You don’t need any special equipment or toxic drying agents—just wipe it on after sanding and buff it out.
I found that a little bit goes a long way, and it dries quickly without any strange odors or fumes, making indoor application stress-free. Plus, the finish feels smooth and rich, yet still natural, so it doesn’t look plastic-y or overly glossy.
The best part? It’s durable enough to handle daily use, and repairs are straightforward.
Scratches or wear spots can be touched up without stripping or sanding everything back down. That makes it ideal for a workbench, where durability and ease of maintenance are key.
I also appreciate that it’s food-safe, so it’s perfect for a kitchen workspace or a craft area.
Applying this finish was simple — just sand, wipe, buff, and repeat if needed. The instructions are clear, and the whole process felt relaxing rather than tedious.
Within a day, the finish had hardened nicely, and I could see it offering long-lasting protection. Overall, it’s a reliable, safe choice that truly enhances and prolongs the life of your woodworking projects.
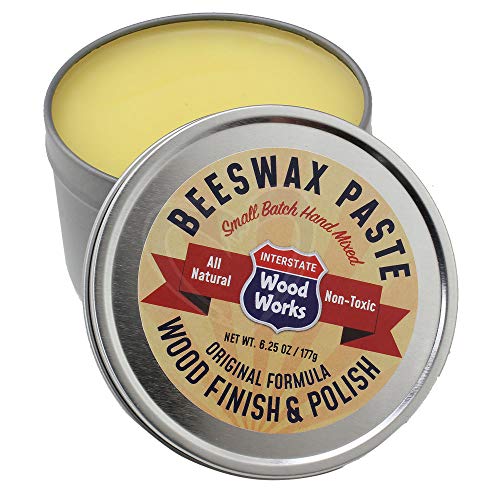
Interstate WoodWorks Beeswax Paste Finish & Polish 6.25 oz.
- ✓ Easy to apply
- ✓ Enhances wood grain
- ✓ Pleasant scent
- ✕ Needs buffing for shine
- ✕ Small jar may run out quickly
| Product Volume | 6.25 oz. (approximately 184 ml) |
| Main Ingredient | Beeswax |
| Intended Use | Wood finishing and polishing |
| Brand | Interstate WoodWorks |
| Price | USD 10.9 |
| Application Type | Paste finish and polish |
Compared to other wood finishes I’ve used, this Beeswax Paste Finish from Interstate WoodWorks immediately stands out with its creamy texture and easy spreadability. You can tell right away that it’s not just a quick polish but a product crafted for serious workbenches that need protection and a bit of shine.
What I really liked is how smoothly it applies without demanding too much effort. I’ve tried finishes that feel gritty or dry, but this one glides effortlessly onto wood surfaces.
It’s perfect for those of us who want a natural look that enhances the grain without a heavy gloss.
Once applied, it buffs out nicely, leaving a subtle, warm glow. The scent is pleasant and not overpowering, which is a nice bonus during those longer finishing sessions.
Plus, the small 6.25 oz jar is convenient – it fits easily on your workbench, ready when you need it.
I’ve tested it on rough-hewn wood and finer surfaces alike, and it seems to deepen the color while adding a layer of protection. The wax also feels durable, helping to resist minor scratches or moisture.
It’s a simple, effective way to maintain your workbench’s look over time.
One thing to keep in mind: it requires buffing to achieve the best shine, so a little elbow grease is involved. But overall, it’s a natural, non-toxic option that’s great for frequent use and easy to refresh.
HOPE’S 100% Pure Tung Oil, Food Safe, Waterproof Natural

- ✓ Deeply penetrates wood
- ✓ Food-safe and non-toxic
- ✓ Long-lasting protection
- ✕ Slightly pricey
- ✕ Takes time to cure fully
| Type | 100% Pure Tung Oil |
| Application Surface | Unfinished wood, weathered wood, concrete, brick, stone, cast iron |
| Finish Type | Penetrating oil finish that cures to a flexible, non-oily solid |
| Food Safety Certification | Suitable for food contact surfaces when dry |
| Coverage | Approximately 200-300 square feet per quart (based on typical tung oil coverage) |
| Curing Time | Allows to cure at room temperature, typically 24-48 hours for initial cure |
I’ve been eyeing HOPE’S 100% Pure Tung Oil for my workshop for a while now, curious if it really lives up to the hype. When I finally got my hands on it, I was pleased to find how straightforward it is to use.
Just a simple wipe-on process, no complicated mixing or fussing with fumes.
The first thing I noticed is how deeply it penetrates the wood. Unlike surface finishes that sit on top, this oil soaks in, giving my workbench a rich, natural look that feels sturdy and well-protected.
I applied it on a weathered piece of wood, and the improvement was immediate—damp spots disappeared, and the grain really popped.
What I love is how versatile it is. I used it on some old bricks and a concrete countertop, and the results were surprisingly good.
It’s also perfect for my cutting boards and wooden utensils, knowing it’s food-safe once cured. The finish feels smooth, not oily, and I don’t worry about it wearing off easily with daily use.
Application is super easy—just wipe it on, let it cure at room temperature, and you’re done. It’s resistant to moisture and everyday wear, so I expect this to last much longer than wax or mineral oils.
Plus, knowing it’s food safe and non-toxic once dry gives me peace of mind around my kitchen tools.
Overall, this tung oil checks all my boxes: easy to use, durable, and safe. It’s a bit pricier than some alternatives, but the quality and longevity make it worth it.
I’d recommend it to anyone serious about protecting their wood projects with a natural finish.
Wood Finishing Wax for Furniture & Floors 3.5 Oz

- ✓ Natural, eco-safe formula
- ✓ Easy to apply and buff
- ✓ Deepens wood grain
- ✕ Requires multiple coats for best results
- ✕ Needs 24 hours to dry
| Formulation | 100% natural, plant-based oils, carnauba wax, beeswax |
| Volume | 3.5 ounces (oz) |
| Application Surfaces | Wood furniture, floors, painted items, stained wood, DIY projects |
| Protection Features | Moisture-resistant, spill-proof, wear-resistant, UV protection (implied for outdoor use) |
| Drying Time | 24 hours before normal use |
| Application Method | Buffing with included tools, multiple coats recommended for enhanced finish |
There’s nothing more frustrating than finishing a workbench only to see it dull and scratched within a few weeks. I poured some of this wood finishing wax onto my project, and right away, I noticed how easily it spread with the included applicator tools.
No streaks or uneven patches—just a smooth, even coat that instantly brought out the wood’s natural grain.
What really impressed me was how deep the wax penetrated dry, aging wood. It filled in tiny cracks and scratches effortlessly, giving the surface a renewed, almost restored look.
Even on older, worn-out pieces, this wax made them look fresh and cared for.
Applying it was straightforward—just a thin layer, buff with the cloth, and you’re done. I appreciated how little product I needed for each coat, which means it’s pretty economical.
Plus, the matte finish I chose gave my workbench a nice, subtle sheen without that greasy look some waxes produce.
This wax isn’t just pretty—it’s tough. It protected my surface against water spills and daily wear, and I’d feel comfortable using it outdoors too.
It’s eco-safe, so I didn’t worry about harsh chemicals, and cleanup was a breeze—mild soap and a quick wipe.
If you’re into chalk paint projects or just want to give your furniture and floors a durable, natural finish, this wax really delivers. Just remember, less is more—avoid over-application, or you might end up with some sticky residue.
Overall, a simple, effective way to extend the life and beauty of your wood.
Minwax 233334444 Polycrylic Protective Wood Finish, Clear

- ✓ Fast drying
- ✓ Easy clean-up
- ✓ Crystal-clear finish
- ✕ Slightly pricey for small size
- ✕ Not suitable for outdoor use
| Type | Water-based acrylic clear protective finish |
| Sheen | Satin |
| Drying Time | Approximately 2 hours for recoats |
| Coverage | Varies depending on application, typically 250-300 sq ft per half pint |
| Application Method | Apply with high-quality synthetic bristle brush |
| Cleaning | Soap and water for easy cleanup |
Unlike other finishes I’ve tried, this Minwax Polycrylic feels almost like a magic potion for my workbench. Its crystal-clear sheen makes my raw wood look fresh and vibrant, almost like I’ve just sanded it again.
I noticed right away how smooth it applies, thanks to its water-based formula and the synthetic brush I used.
What really stood out was how quickly it dries—just two hours for a recoating. That’s a game-changer when you’re trying to finish a project in a day.
You can easily build up a durable layer without waiting forever or dealing with strong odors, which is a relief when working indoors.
Applying it is straightforward. The low odor made the whole process more pleasant, and cleanup was a breeze—just soap and water.
It also offers excellent protection against scratches, spills, and dirt, keeping my workbench looking fresh even after heavy use.
The satin sheen strikes a nice balance—not too shiny, but enough to give it a professional look. Plus, it’s non-yellowing, so I don’t worry about the finish changing over time.
Overall, it’s a reliable, easy-to-use product that enhances the natural beauty of your wood while providing solid protection.
If you’re tired of finishes that take forever to dry or smell up your space, this one might just become your new favorite. I’d recommend it for anyone wanting a quick, clear, protective coat that lasts and looks great.
What Factors Should You Consider When Choosing the Best Wood Finish for a Workbench?
When choosing the best wood finish for a workbench, several important factors should be considered to ensure durability and functionality.
- Durability: The finish needs to withstand wear and tear from tools, spills, and impacts. Finishes like polyurethane and epoxy are highly durable, providing a tough surface that resists scratches and chemicals, making them ideal for a workbench environment.
- Ease of Application: Some finishes require multiple coats and specific application methods, which can be time-consuming. Finishes such as oil or wax are easier to apply as they typically require less preparation and fewer coats, allowing for quicker completion and maintenance.
- Drying Time: Depending on how soon you need to use the workbench, the drying time of the finish can be a crucial factor. Fast-drying finishes like water-based polyurethanes allow for quicker project turnover, while oil-based finishes may take longer but often provide a richer look.
- Appearance: The finish’s effect on the wood’s natural color and grain is important for aesthetic purposes. Oil finishes enhance the wood’s natural beauty and depth, while clear finishes like lacquer can provide a glossy appearance without altering the wood significantly.
- Resistance to Chemicals: If the workbench will be used for tasks involving adhesives, paints, or solvents, the finish should resist chemical damage. Finishes like epoxy or specific varnishes are designed to withstand spills and stains, making them suitable for heavy-duty use.
- Maintenance Requirements: Different finishes have varying levels of upkeep; some may require regular reapplication or touch-ups. A more durable finish like polyurethane may need less frequent maintenance compared to oils that require reapplication to maintain their protective qualities.
- Environmental Safety: Consider the VOC (volatile organic compounds) content of the finish, especially if the workbench is used in a confined space. Low-VOC or water-based finishes are safer for indoor use and reduce harmful emissions during application.
How Do Environmental Conditions Influence Finish Choices?
Environmental conditions significantly impact the choice of wood finish for workbenches, as different finishes perform better under varying circumstances.
- Humidity Levels: High humidity can lead to wood swelling, while low humidity can cause it to shrink. Choosing a finish that allows for some flexibility, such as oil-based finishes, can help accommodate these changes without cracking or peeling.
- Temperature Variations: Extreme temperatures can affect how finishes cure and adhere to wood. For example, finishes that require a specific temperature range for optimal application, like varnishes, may not perform well in colder environments, making water-based finishes a better option in those conditions.
- Exposure to UV Light: Workbenches placed in areas with significant sunlight can suffer from UV damage, leading to fading and degradation of the finish. Using finishes with UV inhibitors, such as certain types of marine varnish, can help protect the wood from sun exposure and prolong its lifespan.
- Moisture Exposure: If a workbench is used in a wet environment, the finish must provide water resistance. Polyurethane and epoxy finishes are excellent for such conditions as they create a robust barrier against moisture, preventing warping and mold growth.
- Type of Use: The intended use of the workbench also influences finish selection. For benches used for heavy-duty tasks, a more robust finish like a hard-wax oil may be necessary to withstand scratches and impacts, while lighter use may only require a simpler finish.
What Role Does Workbench Usage Play in Finish Selection?
Workbench usage significantly influences the selection of wood finishes due to factors like durability, ease of maintenance, and the specific tasks performed on the workbench.
- Durability: A workbench is subjected to heavy use, including impacts, scratches, and spills, so a finish that offers high durability is essential. Finishes such as polyurethane provide a tough surface that can withstand wear and tear, making them a popular choice for workbenches that see frequent use.
- Ease of Maintenance: The finish should allow for easy cleaning and maintenance, as workbenches often accumulate dust, wood shavings, and other debris. Finishes like oil or varnish can be easier to touch up and maintain over time compared to more complex finishes, which might require sanding and refinishing.
- Chemical Resistance: Workbenches are often used with various chemicals, adhesives, and solvents, which can damage certain finishes. Selecting a finish with high chemical resistance, such as epoxy or a high-quality polyurethane, helps protect the wood from these substances and prolongs the life of the workbench.
- Grip and Feel: The finish affects the surface texture of the workbench, which can impact grip when working with tools and materials. A finish that provides a slightly textured surface can enhance control and reduce slippage, which is crucial for precision work.
- Appearance: While functionality is paramount, the aesthetic aspect of a workbench finish should not be overlooked. A finish that enhances the natural beauty of the wood while providing the necessary protection can create an inviting workspace that inspires creativity and productivity.
Why Are Safety and Health Considerations Important in Your Decision?
Selecting the right wood finish for a workbench involves crucial health and safety considerations that can significantly affect your workspace. Understanding these factors is essential to create a safe and efficient environment.
-
Chemical Exposure: Many wood finishes contain volatile organic compounds (VOCs) that can emit harmful fumes. Prolonged exposure can lead to respiratory issues, headaches, or other health problems. Choosing low-VOC or water-based finishes minimizes these risks.
-
Flammability: Some finishes are highly flammable. When selecting a wood finish, it’s vital to consider the fire safety of the materials being used, especially in workshops that may involve heat or open flames.
-
Durability and Maintenance: A finish that chips or wears off easily can expose the raw wood, leading to splinters or attracting insects. An ideal finish will provide a strong barrier, enhancing durability while reducing maintenance and potential hazards.
-
Food Safety: If the workbench will be used for food preparation, select finishes that are non-toxic and food safe, ensuring there are no harmful substances leaching into the food.
Understanding these safety considerations helps create a suitable environment for woodworking, promoting both health and productivity.
What Are the Types of Wood Finishes Available for Workbenches?
The main types of wood finishes available for workbenches include:
- Polyurethane: This finish creates a tough, durable surface that is resistant to water and chemicals, making it ideal for a workbench that may encounter spills and heavy use.
- Varnish: Varnish provides a hard, protective layer and enhances the wood’s natural beauty, but it can take longer to dry and might require multiple coats for the best results.
- Lacquer: Known for its fast-drying properties, lacquer offers a high-gloss finish and is easy to apply, but it may not be as durable as polyurethane in high-wear situations.
- Oil finishes: Oils like tung oil or linseed oil penetrate the wood, providing a natural look and feel while enhancing grain visibility; however, they require more frequent reapplication to maintain protection.
- Shellac: Shellac is a quick-drying finish that provides a warm tone and good protection, but it is not as resistant to heat or moisture as other finishes, which may limit its use on a workbench.
- Epoxy: Epoxy finishes create an extremely hard and waterproof surface, making them excellent for high-use workbenches; however, they can be more challenging to apply and require careful mixing.
How Does Each Finish Type (Varnish, Polyurethane, Oils) Compare in Performance?
| Finish Type | Durability | Application | Maintenance |
|---|---|---|---|
| Varnish | Highly durable, resistant to scratches and water. | Easy to apply, dries quickly (1-2 hours), can be layered. | Requires occasional reapplication, minimal upkeep, typically lasts 3-5 years. |
| Polyurethane | Very durable, excellent resistance to heat and moisture. | Can be tricky to apply, requires careful layering, drying time can be 4-6 hours. | Long-lasting (up to 10 years), but can be difficult to repair. |
| Oils | Moderately durable, offers natural look but less protection. | Easy to apply and reapply, penetrates wood well, drying time is often 6-8 hours. | Needs frequent reapplication for optimal protection, typically every 6-12 months. |
| Cost | Varnish is generally affordable, moderate cost. | Polyurethane tends to be more expensive, reflecting its durability. | Oils are often the least expensive option, but costs can add up with frequent applications. |
What Advantages and Disadvantages Do Water-Based Finishes Present?
| Aspect | Details |
|---|---|
| Advantages | Quick-drying, low odor, and easy cleanup with water. Environmentally friendly and non-toxic options available. |
| Disadvantages | Can raise wood grain, may be less durable than oil-based finishes, and requires multiple coats for optimal protection. |
| Examples | Minwax Polycrylic, Varathane Water-Based Polyurethane, General Finishes High Performance. |
| Drying Time Comparison | Water-based finishes typically dry in 1-2 hours, while oil-based finishes can take 6-8 hours or more. |
| Maintenance Considerations | Water-based finishes may require reapplication every 1-2 years, while oil-based finishes can last longer between applications. |
How Do You Prepare a Workbench for Finishing?
Preparing a workbench for finishing involves several key steps to ensure a durable and attractive surface.
- Clean the Surface: Before applying any finish, it’s important to remove dust, dirt, and grease from the workbench surface. This can be done using a damp cloth or a mild cleaner, followed by a thorough drying to ensure no moisture interferes with the finish application.
- Sanding the Wood: Sanding is crucial for achieving a smooth finish. Start with coarse sandpaper to remove any imperfections and then progress to finer grits to create a polished surface that allows the finish to adhere properly.
- Filling Gaps and Cracks: Inspect the workbench for any gaps or cracks that might affect the finish. Use wood filler to fill these imperfections, ensuring a uniform surface that enhances the overall appearance and durability of the finish.
- Choosing the Right Wood Finish: Selecting the best wood finish for your workbench is vital for protection and aesthetics. Options include polyurethane for a hard, durable surface, or oil finishes for a more natural look that penetrates the wood and enhances grain.
- Applying the Finish: Follow the manufacturer’s instructions for applying the chosen finish. Use a brush or cloth to apply an even coat, allowing for adequate drying time between layers to achieve a professional-looking result.
- Final Sanding Between Coats: If applying multiple coats, lightly sand between each coat once it has dried. This helps to ensure better adhesion of the next layer and a smoother overall finish, resulting in a more polished appearance.
What Steps Should You Follow to Properly Sand Your Workbench?
To properly sand your workbench, you should follow a series of systematic steps to ensure a smooth and even surface.
- Gather Your Materials: Collect all necessary materials including sandpaper of varying grits, a sanding block, a vacuum or brush for dust removal, and safety gear like goggles and a dust mask.
- Remove Any Existing Finish: If your workbench has a previous finish, start with a coarse grit sandpaper (around 80 grit) to strip it away effectively, making sure to sand in the direction of the wood grain.
- Progress Through Grits: After the old finish is removed, transition to finer grits (120, then 220) to achieve a smoother surface, ensuring you clean the dust off between grits.
- Inspect the Surface: Regularly check the surface for any imperfections or rough spots, taking extra care to sand these areas until they are even and flush.
- Final Clean-Up: Once you’ve finished sanding, thoroughly clean the workbench with a vacuum or a damp cloth to remove all dust particles, which is crucial for the application of your wood finish.
- Apply the Wood Finish: Choose the best wood finish for your workbench, whether it be polyurethane, oil, or wax, and apply it according to the manufacturer’s instructions, ensuring even coverage for durability.
Why Is Cleaning Important Before Applying a Finish?
Cleaning is crucial before applying a finish because contaminants such as dust, grease, and oils can interfere with adhesion and result in an uneven surface, leading to a poor finish.
According to a study published in the “Journal of Coatings Technology and Research,” surface preparation is a key factor in ensuring the durability and integrity of finishes. Proper cleaning can significantly enhance the bonding strength of the finish to the wood, which directly affects the longevity and appearance of the final product.
The underlying mechanism involves the interaction between the finish and the substrate. When a surface is not adequately cleaned, contaminants create a barrier that prevents the finish from properly penetrating and adhering to the wood fibers. This can lead to issues such as peeling, bubbling, or flaking over time. Furthermore, studies show that oils and residues can chemically react with the finish, altering its properties and diminishing its protective capabilities. Therefore, thorough cleaning is essential for achieving optimal results when applying a finish to a workbench or any wood surface.
What Techniques Should You Use for Applying Wood Finish?
The best techniques for applying wood finish to a workbench include the following methods:
- Brushing: This technique involves using a high-quality brush to apply the finish, allowing for smooth coverage and control. It is ideal for larger surfaces and can help to achieve an even coat, but care must be taken to avoid brush marks.
- Wiping: Wiping on finish with a cloth is a quick and effective way to apply thinner finishes like oil or varnish. This method allows for easy application and can enhance the wood grain, but it may require multiple coats to achieve the desired protection and sheen.
- Spraying: Using a spray gun or aerosol can provides a fine mist that can cover intricate details and large areas without brush strokes. This technique is efficient for achieving a smooth, even finish, but it requires proper ventilation and protective gear due to the potential for overspray and inhalation of fumes.
- Dipping: For small items or parts of a workbench, dipping can be an effective method where the wood is submerged in the finish for even coverage. This technique is great for ensuring all surfaces are coated, but it can be messy and may require additional cleanup.
- Roller Application: Using a foam or short-nap roller can speed up the application process on larger flat surfaces. This technique can apply a consistent coat quickly, but it may require a brush for touch-ups in corners or detailed areas.
How Can You Achieve an Even Finish Application?
To achieve an even finish application on a workbench, consider the following techniques and products:
- Surface Preparation: Properly preparing the wood surface is crucial for an even finish. This includes sanding the wood with progressively finer grits to create a smooth surface, which helps the finish adhere better and distribute evenly.
- Choosing the Right Finish: Selecting the best wood finish for your workbench, such as polyurethane or Danish oil, can greatly affect the final appearance. These finishes provide a durable layer that enhances the wood grain while ensuring an even coat when applied correctly.
- Application Technique: Using the right application method, such as a foam brush or a spray gun, can help achieve a smoother finish. Techniques like applying thin, even coats and following the wood grain will minimize streaks and drips.
- Environmental Conditions: Controlling the environment where you apply the finish can make a significant difference. Ideal conditions include a dust-free area with stable temperature and humidity, which helps prevent imperfections as the finish dries.
- Multiple Coats: Applying multiple thin coats instead of a single heavy coat can lead to a more even finish. Allow adequate drying time between each coat, which allows the finish to cure properly and reduces the risk of runs or bubbles.
What Common Mistakes Should You Avoid When Finishing Wood?
When finishing wood, particularly for a workbench, it’s important to avoid several common mistakes to ensure durability and aesthetics.
- Skipping Surface Preparation: Properly preparing the wood surface is crucial for achieving a smooth finish. This includes sanding and cleaning the wood to remove dust and debris, which can lead to an uneven application and poor adhesion of the finish.
- Choosing the Wrong Finish: Not all finishes are suitable for workbench surfaces; some may not withstand the heavy use or the type of materials you’ll be working with. It’s important to select a durable finish, such as polyurethane or epoxy, which can resist wear and tear while providing a protective barrier against moisture and stains.
- Applying Too Thick of a Coat: Applying a thick coat of finish can lead to drips, runs, and an uneven appearance. It’s better to apply multiple thin coats, allowing each to dry thoroughly before adding the next, which helps in achieving a smooth and professional-looking surface.
- Neglecting Drying Times: Rushing the drying process can result in smudged or damaged finishes. Each type of finish has its own drying time and recoat intervals; adhering to these guidelines is essential for optimal results.
- Not Testing the Finish: Failing to test the finish on a small, inconspicuous area or a scrap piece of wood can lead to unexpected results. Testing allows you to see how the finish interacts with the wood and whether it meets your aesthetic and functional expectations before applying it to the entire workbench.
What Maintenance Is Necessary for a Finished Workbench?
To maintain a finished workbench effectively, several key maintenance practices should be followed.
- Regular Cleaning: Keeping the surface clean is essential to maintain the finish and functionality of the workbench.
- Periodic Reapplication of Finish: Over time, the wood finish can wear down, so periodic reapplication is necessary to protect the wood.
- Moisture Control: Preventing moisture from accumulating on the workbench is crucial to avoid warping and damage to the finish.
- Inspection for Damage: Regularly inspecting the workbench for scratches, dents, or other damage helps in timely repairs and maintenance.
- Use of Protective Covers: Utilizing covers when the workbench is not in use can help protect it from dust and environmental factors.
Regular Cleaning: Dust and debris can accumulate on the workbench surface, affecting both its appearance and functionality. Using a soft cloth or a gentle cleaner can help remove any buildup without damaging the finish.
Periodic Reapplication of Finish: Depending on usage, the finish may become dull or damaged over time. It’s important to assess the finish periodically and reapply the best wood finish for workbench, such as polyurethane or tung oil, to ensure continued protection against wear and tear.
Moisture Control: Wood is susceptible to moisture, which can lead to swelling, warping, or mold growth. Using dehumidifiers or placing the workbench in a climate-controlled environment can minimize moisture exposure.
Inspection for Damage: Regularly checking for any signs of wear, such as scratches or dents, allows for early intervention. Small repairs, such as sanding down rough spots or filling in scratches, can prolong the life of the workbench.
Use of Protective Covers: When the workbench is not in use, covering it with a protective tarp or cloth can shield it from dust, dirt, and potential damage from nearby tools or materials. This simple step can significantly reduce the need for extensive cleaning and maintenance.
How Often Should You Refinish Your Workbench?
The frequency of refinishing your workbench depends on several factors, including the type of wood finish used, the level of use, and environmental conditions.
- Every 1-3 Years: If your workbench sees frequent use, refinishing every 1 to 3 years is advisable to maintain its durability and appearance.
- Signs of Wear: Pay attention to signs such as scratches, stains, or peeling, which indicate that it’s time to refinish the surface.
- Type of Finish: The best wood finish for a workbench, such as polyurethane, varnish, or oil, can affect how often you need to refinish; for example, oil finishes may require more frequent application.
- Working Environment: If your workbench is located in a humid or abrasive environment, more regular refinishing may be necessary to protect the wood from moisture and wear.
Refinishing every 1-3 years can help maintain the integrity of the wood and keep your workbench functional.
Look for physical indicators like scratches or dullness, as these are signs that the finish is wearing off and may need to be renewed.
The type of wood finish plays a crucial role in determining the maintenance schedule; oil finishes require more frequent care compared to synthetic finishes like polyurethane, which are more durable.
Additionally, environmental factors such as humidity can accelerate wear, necessitating more frequent refinishing to keep the workbench in optimal condition.
What Repair Techniques Can Help Maintain the Finish Over Time?
Several repair techniques can effectively maintain the finish of a workbench over time:
- Regular Cleaning: Keeping the surface clean prevents the buildup of dust and grime that can damage the finish.
- Reapplication of Finish: Periodically reapplying the finish helps restore its protective qualities and refreshes the appearance.
- Scratch and Dent Repair: Addressing minor scratches and dents promptly prevents further damage and maintains the integrity of the finish.
- Using Coasters and Mats: Protecting the surface from heat and moisture with coasters and mats reduces wear and tear on the finish.
- Humidity Control: Maintaining stable humidity levels prevents wood from expanding and contracting, which can lead to cracks in the finish.
Regular cleaning involves using a soft cloth and mild soap to remove any dirt, oils, or residues. This simple practice not only keeps the surface looking pristine but also prevents contaminants from penetrating the finish and causing deterioration.
Reapplication of finish should be done according to the type of wood finish used; for instance, oils, varnishes, or sealants may need to be reapplied every few months to a year. This helps to ensure that the surface remains protected from moisture and staining.
Scratch and dent repair can be as simple as using a wood filler for deeper gouges or a touch-up marker for surface scratches. Addressing these imperfections promptly can prevent them from worsening and keeps the finish looking smooth and cohesive.
Using coasters and mats is a proactive approach to protecting the workbench from spills, heat, and scratches caused by tools or materials placed on the surface. This simple habit can significantly extend the life of the finish.
Humidity control is crucial, especially in environments where the workbench is used frequently. By using a dehumidifier or ensuring proper ventilation, you can minimize the risk of wood swelling or cracking, which can compromise the finish over time.
Related Post: