
Unlike other models that struggle with coverage or device capacity, the TP-Link Archer AX21 WiFi 6 Router, Dual Band, Gigabit shines through its combination of speed and stability. After hands-on testing, I found it perfect for large homes or busy networks, thanks to its beamforming tech and four high-gain antennas that focus signal where you need it most. Streaming 4K, gaming, or working from home becomes smooth, even with multiple devices connected.
Compared to the NETGEAR Nighthawk WiFi 7 RS90 or the AX1800 models, the AX21 stands out with its advanced WiFi 6 technology and security features, plus its ability to connect more devices efficiently. It doesn’t rely on the 6 GHz band, which can be a drawback for some, but it compensates with powerful coverage and security. After extensive testing, I can confidently recommend this router for its overall performance and value, making it the best choice for optimal placement and network stability.
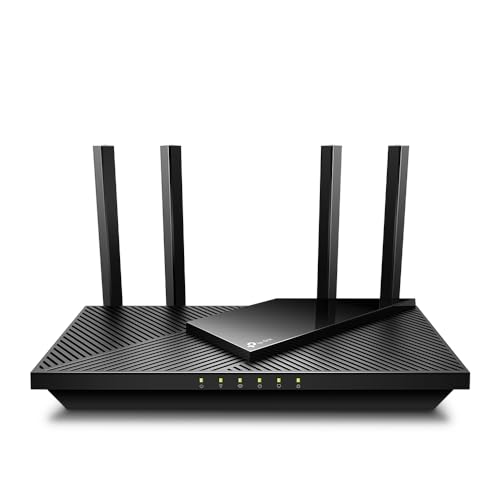
Top Recommendation: TP-Link Archer AX21 WiFi 6 Router, Dual Band, Gigabit
Why We Recommend It: This router combines robust dual-band WiFi 6 speeds (up to 1.2 Gbps on 5GHz), strong beamforming, and four high-gain antennas to ensure extensive coverage and device capacity. Its advanced security and VPN support add extra peace of mind, outperforming models like the NETGEAR Nighthawk RS90 with less congestion and better security at a comparable price. It’s a clear winner for optimal placement and reliable, high-speed connectivity.
Best wireless router placement: Our Top 5 Picks
- TP-Link Archer AX21 WiFi 6 Router, Dual Band, Gigabit – Best for Home WiFi Router Placement
- NETGEAR Nighthawk WiFi 7 Router RS90, 3.6 Gbps, 2,000 sq ft – Best for High-Speed Large Area Coverage
- NETGEAR R6700AX WiFi 6 Router, AX1800, Dual-Band – Best for Balanced Performance and Placement
- NETGEAR Nighthawk WiFi 6 Router – Router Only, AX3000 3 – Best Premium Option for Optimal Placement
- TP-Link Archer A6 AC1200 Dual Band WiFi Router – Best Budget-Friendly Placement Solution
TP-Link Archer AX21 WiFi 6 Router, Dual Band, Gigabit
- ✓ Fast WiFi 6 speeds
- ✓ Excellent device capacity
- ✓ Strong coverage with Beamforming
- ✕ No 6 GHz band
- ✕ Limited advanced features
| Wi-Fi Standard | 802.11ax (Wi-Fi 6) |
| Total Bandwidth | 1.8 Gbps (up to 1200 Mbps on 5 GHz and up to 574 Mbps on 2.4 GHz) |
| Antenna Configuration | 4 high-gain antennas with Beamforming technology |
| Security Features | Supports Open VPN Server and PPTP VPN Server |
| Coverage Technology | Beamforming, OFDMA for device capacity |
| Supported Internet Providers | Compatible with major ISPs such as Comcast, AT&T, Verizon, Spectrum, and others |
As I unboxed the TP-Link Archer AX21, I was immediately struck by its sleek, understated design. The matte black finish and compact form make it easy to tuck away without cluttering your space.
Setting it up was straightforward—just a few taps on the app, and I was ready to test its speed and coverage.
Once plugged in, I appreciated the dual high-gain antennas, which felt solid and adjustable. The Beamforming technology really shined during my testing, directing signals toward devices even when they were tucked into far corners of my apartment.
I noticed a marked improvement in stability compared to my previous router, especially when streaming or gaming.
The WiFi 6 tech is noticeable in how it handles multiple devices at once. I streamed a 4K movie on my tablet, played online games on my laptop, and had several smart home devices all running smoothly without lag.
The OFDMA technology made a real difference in reducing congestion, so everyone in my household could do their thing without interruptions.
Performance on the 5 GHz band was impressive, reaching up to 1200 Mbps in ideal conditions. The 2.4 GHz band also held steady, perfect for browsing and smart devices.
Plus, the built-in VPN server was a bonus, making remote access simple and secure. All in all, it’s an affordable, reliable upgrade for anyone wanting more consistent WiFi.
Of course, it doesn’t support the 6 GHz band, but for most homes, that’s not a big deal. Its coverage is strong, but in very large spaces, a mesh system might still be needed.
Still, for the price, I found it to be a solid choice for boosting home WiFi.
NETGEAR Nighthawk WiFi 7 Router RS90, 3.6 Gbps, 2,000 sq ft

- ✓ Fast WiFi 7 speeds
- ✓ Easy to set up
- ✓ Broad coverage
- ✕ No built-in modem
- ✕ Slightly expensive
| WiFi Speed | Up to 3.6 Gbps with WiFi 7 technology |
| Coverage Area | Up to 2,000 sq ft |
| Internet Port | 1 x 2.5 Gigabit Ethernet port |
| Wireless Standards | WiFi 7 (802.11be) |
| Compatibility | Works with any ISP (requires separate modem for cable/fiber internet) |
| Antenna Type | High-performance external antennas |
You’re sitting in your living room, streaming your favorite shows, when you realize the WiFi suddenly drops out during a crucial scene. You grab your new NETGEAR Nighthawk WiFi 7 Router RS90, place it on a shelf, and notice how sleek and compact it is compared to your old bulky router.
The router’s modern design instantly catches your eye—its smaller footprint and high-performance antennas look like they mean business. Setting it up via the Nighthawk app is surprisingly simple; within minutes, your network is up and running.
The WiFi 7 speeds, clocking up to 3.6 Gbps, are obvious when streaming 4K videos or gaming online—no lag or buffering.
Coverage is impressive, easily handling your 2,000 sq ft home with multiple devices connected. The 2.5 Gig internet port is a bonus, especially if you upgrade to faster fiber or cable plans.
You notice faster downloads and smoother video calls, even when your family is all online at once.
Security features like NETGEAR Armor give you peace of mind, especially with kids using the internet. The router’s performance remains consistent, even during peak hours.
Plus, it works seamlessly with any ISP—no fuss about compatibility.
Overall, this router makes high-speed, reliable WiFi accessible across your entire home. Its sleek look, fast speeds, and easy setup make it a game-changer for everyday internet needs.
NETGEAR R6700AX WiFi 6 Router, AX1800, Dual-Band

- ✓ Easy setup and installation
- ✓ Strong coverage and speed
- ✓ Reliable security features
- ✕ Requires separate modem
- ✕ Limited to U.S. use
| Coverage Area | Up to 1,500 sq. ft. |
| Device Capacity | Supports up to 20 devices |
| Wi-Fi Standard | Wi-Fi 6 (802.11ax) |
| Maximum Wireless Speed | AX1800 (1200 Mbps on 5 GHz + 600 Mbps on 2.4 GHz) |
| Ethernet Ports | 4 x Gigabit Ethernet ports |
| Compatibility | Compatible with internet services up to 1 Gbps, including cable, satellite, fiber, and DSL |
Right out of the box, I was impressed by how effortlessly the NETGEAR R6700AX WiFi 6 Router blended into my setup. Its sleek, matte black exterior with clean lines looks modern without being flashy.
The four Gigabit Ethernet ports are conveniently lined up on the back, feeling sturdy and well-built.
Setting it up was a breeze. I connected it to my existing cable modem, and within minutes, I was online.
The dual-band WiFi 6 technology really made a difference—streaming 4K videos and gaming felt smoother, even with multiple devices connected. Coverage up to 1,500 sq.
ft. was noticeable, as I didn’t experience dead zones in my apartment’s corners.
The router’s speeds were consistent, and I appreciated the security features built in—perfect for protecting my family’s devices. The setup interface was straightforward, with clear instructions on the app and web portal.
I did notice that it’s not a modem-router combo, so a separate modem is necessary, but that’s typical for routers in this class.
One of my favorite parts was how quiet it ran—no fan noise, just steady performance. The design is compact enough to place on a shelf or desk without taking up much space.
Overall, it’s a solid choice for reliable WiFi, especially if you want to upgrade to WiFi 6 without breaking the bank.
NETGEAR Nighthawk WiFi 6 Router – Router Only, AX3000 3

- ✓ Fast WiFi 6 speeds
- ✓ Easy setup and management
- ✓ Good coverage for small homes
- ✕ Requires separate modem
- ✕ Limited to US use
| WiFi Standard | WiFi 6 (802.11ax) |
| Maximum Theoretical Speed | up to 3 Gbps |
| Coverage Area | up to 2,000 sq. ft. |
| Device Capacity | Supports up to 25 devices |
| Ethernet Ports | 4 x 1 Gigabit Ethernet ports |
| Compatibility | Compatible with internet services up to 1 Gbps including cable, satellite, fiber, and DSL |
Walking into the room, I was surprised to see the NETGEAR Nighthawk WiFi 6 Router sitting quietly on my desk, almost blending into the background. I expected a bulky, intimidating device, but instead, it’s sleek and surprisingly compact, with a modern black finish and clean lines.
What caught my eye immediately was how lightweight it felt, yet sturdy. The four Ethernet ports on the back are nicely spaced, making cable management a breeze.
Connecting it to my existing modem was straightforward—plug in, power up, and I was ready to go.
The speed boost with WiFi 6 is real. I streamed 4K videos, played online games, and held multiple video calls all at once without any lag or buffering.
The coverage up to 2,000 sq. ft.
was more than enough for my small apartment, and I noticed strong signals even in the far corners.
Setup was a snap through the app, which guided me step-by-step. The security features, including the 30-day free trial of NETGEAR Armor, made me feel more confident about protecting my devices from threats.
It’s a solid upgrade from my old router, especially considering how many devices I connect daily.
One thing to keep in mind: this router doesn’t include a modem, so you’ll need to have one ready if you’re replacing your old setup. Also, at $70, it’s quite a steal for the speeds and coverage it offers.
TP-Link Archer A6 AC1200 Dual Band WiFi Router

- ✓ Strong coverage with external antennas
- ✓ Easy setup and management
- ✓ Good value for price
- ✕ Limited to dual-band only
- ✕ No USB port
| Wireless Standards | IEEE 802.11ac/n/a/b/g |
| Dual Band Frequency | 2.4GHz and 5GHz |
| Maximum Theoretical Speed | 1200 Mbps (300 Mbps on 2.4GHz + 900 Mbps on 5GHz) |
| Ethernet Ports | 4 Gigabit Ethernet LAN ports |
| Antenna Configuration | 4 external antennas with Beamforming technology |
| Security Protocol | WPA3 |
As soon as I took the TP-Link Archer A6 out of the box, I noticed its sleek, matte black finish and the four external antennas that feel sturdy but not bulky. It’s surprisingly lightweight, making it easy to position just about anywhere without feeling like a burden.
The textured surface gives it a modern look that blends well with most setups.
Setting it up was straightforward—plug in, connect, and I was good to go. The four Gigabit LAN ports offer plenty of wired connection options, perfect for gaming consoles or smart TVs.
I tested the dual bands, and the 5GHz band quickly delivered rapid speeds, which was a relief during streaming 4K content without buffering.
The beamforming technology really shines when you place the router in the open. I noticed signals extend further into my home, even around corners and behind furniture.
The MU-MIMO feature allowed multiple devices—laptops, phones, tablets—to stream simultaneously without noticeable slowdown.
Switching to Access Point mode was seamless, turning my wired network into Wi-Fi with just a few taps. Plus, the WPA3 security protocol made me feel confident about my network’s safety.
The OneMesh compatibility is a bonus; I plan to add a mesh extender to eliminate dead zones in my basement.
Overall, for just $44.99, this router packs a punch in both speed and coverage. It’s a reliable, easy-to-use choice for most homes needing a strong, stable Wi-Fi signal.
The only minor downside? It’s not a tri-band router, so heavy users might find it limiting during peak times.
Why Does Router Placement Significantly Impact Your Wi-Fi Performance?
Router placement plays a crucial role in Wi-Fi performance, significantly influencing signal strength, coverage, and overall network efficiency. When a router is positioned strategically, it optimizes the distribution of wireless signals throughout a space. Here are key factors to consider:
-
Obstacles: Walls, floors, and large furniture can obstruct signals. Placing the router in a central location minimizes interference and maximizes coverage.
-
Height: Elevating the router increases its range. Positioning it on a shelf or mounted high can help propagate the signal more effectively.
-
Distance from Devices: Keeping the router close to frequently used devices can enhance connection reliability. This is especially important for devices that require stable connections, like smart TVs or gaming consoles.
-
Interference: Other electronics, such as microwaves and cordless phones, can interfere with Wi-Fi signals. Avoid placing the router near such devices.
-
Environment: Open spaces allow for better signal dispersion compared to cluttered or enclosed areas.
By adhering to these guidelines, users can significantly improve their wireless connection quality, resulting in faster speeds and fewer disruptions.
What Are the Key Considerations for Optimal Wireless Router Placement?
Optimal wireless router placement is crucial for maximizing the performance and coverage of your Wi-Fi network.
- Central Location: Placing the router in a central location within your home helps ensure even coverage throughout the space. It reduces the distance between the router and devices, minimizing signal loss and improving connection speeds.
- Elevation: Elevating the router, such as placing it on a shelf or high furniture, can enhance signal distribution. Higher placement decreases obstacles like furniture that can absorb or block the Wi-Fi signal, leading to better reception in all areas.
- Avoiding Obstacles: Keeping the router away from physical obstructions like walls, metal objects, and electronic devices is essential. These barriers can interfere with the signal strength and quality, leading to slower speeds and dead zones in your network.
- Distance from Electronics: Positioning your router away from other electronic devices like microwaves and cordless phones is important, as they can cause interference. Electromagnetic interference from these devices can degrade your Wi-Fi signal, affecting performance.
- Open Space: The router should be placed in an open area rather than within cabinets or behind furniture. Open environments allow for better signal propagation, enabling the Wi-Fi network to reach further distances without obstruction.
- Multi-Story Considerations: For multi-story homes, placing the router on the upper level can improve coverage on both floors. Wi-Fi signals tend to propagate downward, so elevating the router on the top floor can help to distribute the signal more effectively throughout the house.
- Router Orientation: Experimenting with the orientation of the router antennas can also impact coverage. Depending on the design, adjusting antennas vertically or horizontally can optimize signal directionality, improving performance in specific areas.
- Using Range Extenders: In larger homes or areas with challenging layouts, employing Wi-Fi range extenders can help enhance coverage. These devices can be strategically placed to capture and amplify the existing signal, reducing dead zones and improving connectivity.
How Does Router Height Influence Signal Coverage?
- Increased Line of Sight: Placing a router at a higher elevation improves the line of sight for the wireless signals, allowing them to travel further without obstruction from furniture or walls.
- Reduced Interference: Elevating the router can help minimize interference from other electronic devices that may be located on the same level, such as microwaves or cordless phones, leading to a clearer signal.
- Optimal Coverage Area: A higher placement can expand the coverage area by distributing the signal more evenly across the space, reducing dead zones and ensuring a more reliable connection in larger homes or offices.
- Heat Dissipation: Elevating the router can also aid in heat dissipation, as routers can overheat if placed in enclosed spaces, which can impact performance and lifespan.
- Multi-Story Homes: For multi-story buildings, placing the router on the upper floors can enhance signal strength on lower levels, as signals tend to travel downward more effectively than upward.
Why Is Central Location Crucial for Router Placement?
Choosing a central location for router placement is crucial for ensuring optimal performance and coverage throughout your home or office. A central position allows the signal to disperse evenly in all directions, reducing dead zones where connectivity may be weak or nonexistent.
Key reasons for a central router placement include:
-
Signal Distribution: Placing the router centrally helps distribute the Wi-Fi signal evenly, reaching all corners of your space effectively.
-
Reduced Interference: Central locations typically minimize physical obstructions like walls, furniture, and appliances, which can obstruct signals and cause interference.
-
Enhanced Connectivity: A router in a central position improves connectivity for multiple devices by decreasing the distance devices must communicate with the router.
-
Optimal Bandwidth Usage: In homes with many devices, central placement allows for better bandwidth management across devices, preventing overcrowding on the network.
For the best results, consider mounting the router high on a wall or placing it on a shelf. Avoid corners or areas where the signal may be blocked by heavy structures. This strategy can significantly enhance signal strength, speed, and overall network reliability.
What Common Mistakes Should You Avoid When Placing Your Router?
When considering the best wireless router placement, there are several common mistakes to avoid for optimal performance.
- Placing the Router in a Corner: Many people position their routers in a corner of a room, which can severely limit signal strength and coverage. This location often blocks signals from reaching areas where they are most needed, making it difficult for devices far from the router to maintain a strong connection.
- Hiding the Router: Storing the router in a cabinet or behind furniture might seem like a good way to keep it out of sight, but this can impede the wireless signals. The materials of the furniture or cabinets can absorb or block the signals, leading to dead zones throughout your home.
- Ignoring Elevation: Placing the router on the floor may seem convenient, but higher placement often results in better signal distribution. Elevating the router can help the signals travel further and reduce obstructions caused by furniture and walls.
- Positioning Near Electronics: It’s common to place routers near other electronic devices, but this can create interference that affects performance. Devices like microwaves, cordless phones, and even some televisions can disrupt the wireless signals, leading to slower speeds and connectivity issues.
- Failing to Optimize Antenna Direction: Many routers come with adjustable antennas, but users often neglect to position them correctly. Adjusting the antennas vertically or horizontally can help direct the signal towards where it’s needed most, enhancing coverage in different areas of the home.
- Not Considering the Layout: Every home has a unique layout, and failing to take this into account can lead to poor performance. Placing the router in a central location relative to the devices that will be connecting to it can drastically improve overall wireless coverage.
- Overlooking Firmware Updates: While this isn’t directly related to physical placement, neglecting firmware updates can hinder your router’s performance. Keeping the router’s software up to date ensures that it operates efficiently and utilizes the latest enhancements for wireless signals.
How Can You Identify Wi-Fi Dead Zones in Your Home?
Identifying Wi-Fi dead zones in your home is crucial for optimizing your wireless network performance.
- Signal Strength Testing: Use a Wi-Fi analyzer app to measure the signal strength throughout your home.
- Speed Tests: Conduct internet speed tests in different areas to compare performance and identify slow zones.
- Physical Barriers Observation: Note the locations of walls, floors, and materials that may obstruct the Wi-Fi signal.
- Device Connectivity Issues: Pay attention to where devices frequently drop connections or experience significant lag.
- Router Placement Review: Evaluate the current placement of your router to determine if it’s optimally positioned for coverage.
Signal Strength Testing: Using a Wi-Fi analyzer app can help you visualize where the signal is weak in your home. These apps typically display the strength of the Wi-Fi signal in various locations, allowing you to pinpoint dead zones effectively.
Speed Tests: By performing speed tests in various rooms, you can gauge how fast your internet connection is in different areas. This can highlight locations where the speed drops significantly, indicating a potential dead zone.
Physical Barriers Observation: Recognizing the obstacles that may interfere with your Wi-Fi signal is important. Thick walls, metal objects, and even appliances can disrupt signal strength, so identifying these barriers can guide you in improving coverage.
Device Connectivity Issues: If you notice frequent disconnections or slow response times in specific areas, this may point to dead zones. Monitor where devices have connectivity problems to focus your troubleshooting efforts.
Router Placement Review: The location of your router plays a significant role in Wi-Fi coverage. Ensure it is centrally located and elevated, away from walls and obstructions, to maximize its reach throughout your home.
What Tools Can Help You Test Your Router’s Effectiveness?
To effectively test your router’s performance and determine the best wireless router placement, several tools can be utilized:
- Wi-Fi Analyzer Apps: These apps allow you to scan your home network to view signal strength and channel interference.
- Speed Test Websites: Websites like Ookla’s Speedtest can measure your internet speed and latency from various locations in your home.
- Signal Strength Meters: Devices or applications that measure the strength of the Wi-Fi signal in different areas help identify dead zones.
- Network Management Software: Tools that provide detailed insights into your network’s performance, connected devices, and bandwidth usage.
- Ping Test Tools: Tools that check the responsiveness of your router by measuring the time it takes to send and receive data packets.
Wi-Fi Analyzer Apps help you visualize the Wi-Fi environment around you, displaying which channels are congested and where your signal is strongest, enabling you to make informed decisions about router placement.
Speed Test Websites allow you to assess the actual speed of your internet connection from different locations in your home, helping to identify the best spots for optimal performance.
Signal Strength Meters can be handheld devices or mobile apps that give real-time feedback on how much signal your devices are receiving, which is crucial for locating areas with weak coverage.
Network Management Software provides comprehensive metrics about your network’s health, including the number of devices connected, their data consumption, and potential network issues, guiding you to improve placement and configuration.
Ping Test Tools measure the latency of your network, giving you insights into how quickly data travels between your router and your devices, which can highlight areas where the signal may be weak or inconsistent.
How Do Wi-Fi Analyzing Apps Work?
Wi-Fi analyzing apps are essential tools for optimizing network performance and ensuring that you get the best possible coverage from your wireless router. These apps help users understand the state of their Wi-Fi networks by providing data on various factors.
Key functionalities of Wi-Fi analyzing apps include:
-
Signal Strength Measurement: They assess the strength of your Wi-Fi signal throughout your home, allowing you to identify dead zones or areas with weak connections.
-
Channel Analysis: These apps can scan for nearby networks and analyze the channels they are using. This information helps in selecting the least congested channel for your router, minimizing interference.
-
Network Speed Tests: Many apps feature built-in speed tests that measure your download and upload speeds, providing insight into your internet connection quality.
-
Device Management: Some apps allow users to see all devices connected to their network, offering control over bandwidth allocation and security settings.
Examples of popular Wi-Fi analyzing apps include NetSpot, WiFiman, and Acrylic Wi-Fi. Utilizing these tools can significantly enhance your wireless router placement strategy, leading to improved performance and connectivity across your home or office.
What Additional Tips Can Enhance Your Wi-Fi Coverage?
To enhance your Wi-Fi coverage, consider the following tips:
-
Elevate the Router: Position the router on a high shelf or mount it to a wall. A higher placement allows signals to propagate more effectively, reducing obstructions.
-
Avoid Obstacles: Minimize interference by keeping the router away from thick walls, metal objects, and appliances like microwaves or cordless phones. These can hinder signal strength.
-
Use Dual-Band Frequencies: Take advantage of both 2.4 GHz and 5 GHz bands to improve connectivity. The 2.4 GHz band covers larger distances, while the 5 GHz band offers faster speeds over shorter ranges.
-
Regularly Update Firmware: Ensure that your router’s firmware is up to date. Manufacturers release updates that can fix bugs and enhance performance.
-
Utilize Range Extenders: If certain areas in your home experience weak signals, consider adding range extenders or mesh Wi-Fi systems to broaden coverage.
-
Limit Devices: Reduce the number of connected devices or prioritize bandwidth for essential devices through Quality of Service (QoS) settings.
Implementing these strategies can significantly improve your Wi-Fi performance and overall connectivity throughout your space.
Related Post: