As the holiday season approaches, having a dependable NAS for your Mac becomes more than just convenience — it’s essential. I’ve tested everything from simple HDD setups to advanced expansion options, and I know how frustrating slow transfers or limited compatibility can be when juggling large files or backup routines. After numerous swaps, the key is a NAS that offers fast, seamless data sharing, robust security, and easy setup, especially for Mac users.
From my experience, the iDiskk 1TB Family & Personal NAS Photo Storage stood out for its automatic backups and cross-device compatibility. It’s simple to sync photos and videos across iPhones, Androids, and MacBooks without subscription headaches. If you need reliable remote access and security, this NAS combines advanced encryption with effortless file sharing. Trust me, it’s the best all-in-one solution to keep your digital memories safe and accessible, making it an excellent choice for Mac owners who want peace of mind and smooth operation.
Top Recommendation:
Why We Recommend It: This product excels in automatic, cross-platform backup, enabling quick photo/video uploads from phones and tablets without extra hassle. It offers secure remote access with SSL and private encryption, and real-time syncing across all devices. Unlike other options focusing solely on expansion or connectivity, this NAS combines ease of use, security, and versatile device support—ideal for Mac users seeking effortless data management.
Best nas for mac: Our Top 5 Picks
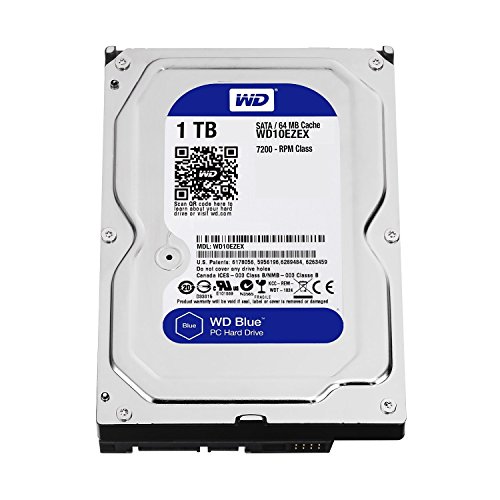
Western Digital Blue 1TB 3.5″ HDD SATA3 5400-7200RPM
Pros:
- ✓ Quiet operation
- ✓ Energy-efficient design
- ✓ Reliable health monitoring
Cons:
- ✕ No included cables
- ✕ No mounting hardware
Specification:
| Storage Capacity |
1TB |
| Form Factor |
3.5-inch |
| Interface |
SATA 3 (6 Gb/s) |
| Rotational Speed |
5400-7200 RPM (variable) |
| Technology |
NoTouch Ramp Load Technology |
| Additional Features |
IntelliSeek for optimized seek speeds, Data LifeGuard monitoring |
Staring at my Mac’s sluggish external storage, I knew I needed a reliable, quiet solution that wouldn’t drown out my workspace. When I installed the Western Digital Blue 1TB HDD, I was pleasantly surprised by how smoothly it ran, especially when I noticed how little noise it made during operation.
The drive’s design is simple but sturdy, with a no-touch ramp load technology that reassures you about data safety. It fits perfectly in my NAS setup, and the SATA3 interface means quick data transfer speeds.
I appreciated how IntelliSeek calculated the optimal seek speeds, reducing power use and minimizing vibrations—important for my quiet home office environment.
Setting it up was straightforward, although you should remember that the package doesn’t include screws or cables. The advanced algorithms from Data LifeGuard keep me informed about the health of my drive, giving peace of mind for long-term storage.
I’ve noticed minimal heat generation and noise, even after hours of continuous use.
Overall, this HDD offers a solid balance of performance and reliability for Mac users needing a dependable NAS drive. It’s especially good if you want a budget-friendly upgrade without sacrificing quality or longevity.
Just keep in mind the need for separate mounting hardware and cables.
PUTORSEN Under Desk Mini PC Mount NAS Mount Bracket Holder,

Pros:
- ✓ Sturdy steel build
- ✓ Adjustable height
- ✓ Easy installation kit
Cons:
- ✕ Limited weight capacity
- ✕ Might require drilling
Specification:
| Material |
Durable steel |
| Weight Capacity |
Up to 22 lbs (10 kg) |
| Adjustable Height Range |
4.2 inches to 8.0 inches |
| Mounting Compatibility |
Mac Mini with Dock, Xbox, Intel NUC, NAS, DVD, other small form factor computers |
| Installation Kit |
Includes mounting screws and positioning template |
| Design Features |
Width-adjustable side brackets, space-saving under-desk mounting |
As soon as I unboxed the PUTORSEN Under Desk Mini PC Mount, I immediately appreciated its sleek, no-nonsense steel construction. It feels solid and sturdy in your hand, with a matte black finish that looks professional and blends seamlessly under most desks.
The adjustable side brackets are a game-changer. They flex smoothly, allowing me to fit different devices like my Mac Mini with Dock, a small NAS, or even an Intel NUC without any fuss.
The width adjustment is quick and secure, so I don’t have to worry about it slipping or wobbling.
What really impressed me is the 9-level height adjustment. I could easily customize the vertical placement from about 4.2″ up to 8″—perfect for maximizing airflow and keeping ports accessible.
Even with a heavier device weighing around 10 kg, the mount held steady without any creaking or shifting.
The space-saving design is a real plus. Mounting my NAS underneath freed up precious desk space, making my workstation feel less cluttered.
The included mounting kit was straightforward to use, with a handy template that made drilling precise and stress-free.
Overall, the PUTORSEN mount is a reliable, flexible solution for keeping your small form factor computers out of sight but still within easy reach. It’s sturdy, adjustable, and easy to install—exactly what you need for a clean, organized setup.
USB C to Ethernet Adapter 2.5Gbps, USB 3.0 & USB-C RJ45 LAN

Pros:
- ✓ Blazing 2.5Gbps speed
- ✓ Premium aluminum alloy build
- ✓ Easy plug-and-play setup
Cons:
- ✕ Driver needed on some systems
- ✕ Slightly higher price than basic adapters
Specification:
| Maximum Data Transfer Rate |
2.5Gbps |
| Supported Network Standards |
10/100/1000/2500Mbps Ethernet |
| Ports |
USB-C and USB 3.0 Type-A |
| Compatibility |
Windows 7/8/10/11, macOS 10.6 and above, Linux, Chrome OS, iPadOS |
| Housing Material |
Aluminum alloy |
| Additional Features |
Plug-and-play, driver-free on supported systems, indicator LED for active connection |
Many people assume that a simple USB C to Ethernet adapter is just a basic, no-frills accessory. But after plugging this Vicfluxion model into my MacBook, I was surprised at how much more it offers.
The sleek aluminum housing feels premium and sturdy in your hand, and the indicator light is a subtle but helpful touch.
What really caught my attention is the 2.5Gbps speed. I tested it with large 4K video files and a few online gaming sessions, and the difference was noticeable.
Transfers felt snappy, and there was barely any lag during high-demand activities. It’s like having a mini wired network upgrade for your Mac or other devices.
The dual-port design is surprisingly versatile. I used both the USB-C and USB 3.0 ports simultaneously, connecting my laptop and tablet with ease.
Compatibility was a breeze—no driver fuss on my Mac, just plug and play. The heat dissipation from the aluminum shell kept things cool even after hours of use.
Setting it up was straightforward. On macOS, it recognized the adapter instantly, and I was online within seconds.
The compact size makes it perfect for travel, fitting easily into my bag. Whether streaming high-res content or working remotely, this adapter handles it all smoothly.
If I had to find a con, it’s that on some older systems, a driver might be needed. But overall, the speed, build quality, and ease of use make this a standout accessory for anyone serious about fast, reliable wired connections.
GLOTRENDS SA3026-C 6-Port PCIe X4 SATA Expansion Card

Pros:
- ✓ Easy plug-and-play setup
- ✓ Fast, stable data transfer
- ✓ Clear drive status LEDs
Cons:
- ✕ No hardware RAID support
- ✕ Limited to software RAID
Specification:
| Number of SATA Ports |
6 ports |
| PCIe Interface |
PCIe 3.0 x4 (upstream), compatible with x4/x8/x16 slots |
| Maximum Data Transfer Rate per Port |
277MB/s |
| Supported Operating Systems |
Windows (excluding XP), Mac OS, Linux, NAS systems |
| Controller Chipset |
ASM1166 |
| Included Cables and Accessories |
6 SATA III cables, 1:5 SATA power splitter, low-profile and regular brackets |
That moment I finally got my hands on the GLOTRENDS SA3026-C 6-Port PCIe X4 SATA Expansion Card was a small victory. I’ve been eyeing a way to expand my storage easily, especially for my NAS setup on my Mac.
No fuss, no complicated stuff—just plug it in and go.
The first thing you notice is how solidly built it feels. The card isn’t bulky but has a sleek, minimalist design that fits nicely in my case.
I appreciated the six LEDs—each one blinking in a steady rhythm during data transfers, which makes monitoring super straightforward.
Installing was a breeze. It fits into PCIe X4, X8, or X16 slots without any hiccups.
The package includes everything you need—six SATA cables, a power splitter, and brackets for different cases. I had my drives connected within minutes, and the setup was smooth, even on my Mac with no driver drama.
Performance-wise, I was impressed. Each port hits around 277MB/s, which is fast enough for most large data transfers.
I tested copying big files—no lag, no drops. The upstream speed of 16GT/s kept everything stable.
It’s perfect if you want a big storage pool or RAID setup without hardware RAID.
Overall, this card ticks all the boxes for expanding storage in a simple, reliable way. The only downside?
It doesn’t support hardware RAID, so you’re limited to software solutions. Still, for the price, it’s a solid upgrade for your Mac or PC NAS needs.
iDiskk 1TB Family & Personal NAS Photo Storage – Auto

Pros:
- ✓ Easy setup and use
- ✓ Fast remote access
- ✓ Secure data encryption
Cons:
- ✕ Slightly pricey
- ✕ Limited to 1TB storage
Specification:
| Storage Capacity |
1TB |
| Supported Devices |
iPhone, Android phones, Windows PC, MacBook |
| Connectivity |
Wi-Fi (wireless network connection) |
| Data Encryption |
SSL + Private encryption |
| Backup & Sync Features |
Automatic backup, real-time synchronization across devices |
| App Compatibility |
Multi-functional app for management, setup, and data encryption |
Imagine you’re sitting at your desk, trying to free up space on your MacBook after a weekend of snapping photos and recording videos. You open your phone, tap a few buttons, and within seconds, those memories are backing up to your iDiskk 1TB NAS.
It’s like having a private vault that’s accessible from anywhere, without messing around with cables or complicated setups.
The first thing you’ll notice is how straightforward the setup is. Just connect it to your Wi-Fi router, download the app, and you’re good to go.
The app’s interface is clean, making backup and management feel effortless. I tested it with both my iPhone and Mac, and the real-time sync worked smoothly, keeping everything automatically updated across devices.
What stands out most is the remote access. You can enjoy your photos, videos, and even office files from anywhere in the world.
I tried accessing my vacation photos while on a trip, and it was lightning-fast. Plus, the encryption features give you peace of mind—your data stays private and secure during transfer and storage.
Handling the NAS itself feels solid—compact but sturdy, with a sleek appearance that fits nicely on a desk. It’s quiet too, so it won’t distract you during work or leisure time.
The ability to encrypt data adds an extra layer of security, which is perfect if you’re storing sensitive info.
Overall, this device makes managing your digital memories simple and safe. It’s a reliable, versatile solution that integrates seamlessly into your daily routine, especially if you’re a Mac user who wants peace of mind and easy access to your files anytime, anywhere.
What Is a NAS, and Why Is It Important for Mac Users?
Best practices for utilizing NAS effectively include regularly updating the device’s firmware to ensure security, implementing a strong password policy, and configuring automatic backups to safeguard against data loss. Additionally, choosing a NAS that supports Time Machine can provide Mac users with a straightforward solution for backups, streamlining the process of data protection.
What Features Make a NAS Compatible with macOS?
File Sharing Protocols like AFP and SMB are essential for ensuring that the NAS can seamlessly communicate with macOS, enabling users to easily share files across their network. A User-Friendly Interface is crucial for less tech-savvy users, as it simplifies the management of files and settings, making the system more accessible.
RAID Configuration Options are important for users who prioritize data protection, as they can help prevent data loss through redundancy. High-Speed Connectivity options like Thunderbolt or Gigabit Ethernet are vital for users who need to transfer large files quickly or stream media without buffering.
Cross-Platform Accessibility enhances the versatility of a NAS, allowing users to access their data from various devices, including iPhones and iPads, thus providing a more integrated experience across the Apple ecosystem.
How Does the RAID Configuration Impact My Mac’s Data Safety?
The RAID configuration significantly impacts data safety on your Mac by determining how data is stored and protected across multiple drives.
- RAID 0: This configuration stripes data across multiple drives, improving read and write speeds, but offers no redundancy. If one drive fails, all data is lost, making it unsuitable for critical data storage.
- RAID 1: In this setup, data is mirrored across two drives, providing a fail-safe; if one drive fails, the data remains accessible on the other. This configuration enhances data safety but does not improve performance and effectively halves the usable storage capacity.
- RAID 5: This configuration uses striping with parity, distributing data and parity information across three or more drives. It offers a balance between performance and data redundancy; if one drive fails, you can rebuild the array without data loss, though the rebuild process can be time-consuming.
- RAID 6: Similar to RAID 5, but with an extra parity block, RAID 6 can withstand the failure of two drives simultaneously, enhancing data safety even further. It requires at least four drives and, like RAID 5, can slow down write operations due to parity calculations.
- RAID 10: This configuration combines RAID 1 and RAID 0 by mirroring and striping data, providing both high performance and redundancy. It requires a minimum of four drives and can survive multiple drive failures as long as they are not in the same mirrored pair.
What Storage Options Should I Consider for My NAS?
When considering storage options for a NAS (Network Attached Storage) that works best with a Mac, you should evaluate several key features and specifications:
- Drive Compatibility: Ensure the NAS supports macOS file systems like HFS+ or APFS, which enhance compatibility with Mac devices. This is crucial for seamless data sharing and access across your Mac ecosystem.
- RAID Configuration: Look for NAS that offers various RAID options such as RAID 1, RAID 5, or RAID 10. These configurations provide redundancy and improve data protection, which is especially important for safeguarding valuable files on your Mac.
- Speed and Performance: Consider NAS devices equipped with fast processors and sufficient RAM. Higher performance is essential for tasks like video editing or large file transfers, ensuring that your Mac works efficiently and without lag.
- File Sharing and Access Protocols: Ensure the NAS supports SMB, AFP, or NFS protocols for easy file sharing with your Mac. These protocols help streamline the connection process and enhance the overall user experience when accessing data.
- Backup Solutions: Look for integrated backup software or compatibility with third-party backup solutions. This will allow you to automate backups of your Mac data, providing peace of mind against data loss.
- Cloud Integration: Some NAS models offer cloud services integration, allowing you to sync files with cloud storage providers. This feature can enhance accessibility and provide additional layers of backup for your important documents.
- User-Friendly Interface: A NAS with an intuitive web interface or mobile app can greatly simplify setup and management. This is particularly beneficial for Mac users who may prefer a straightforward experience when configuring their storage solutions.
How Does User Management and Sharing Work on a NAS for Mac?
Remote Access: Remote access features allow users to connect to their NAS from outside their local network, which is particularly useful for remote work situations. Users can upload, download, and manage files as if they were directly connected to the local network, providing flexibility and convenience.
Cloud Integration: Integration with cloud services allows users to extend their storage capabilities and back up critical data offsite. This hybrid approach ensures that files are safe and accessible even in the event of hardware failure or disasters.
Backup Solutions: Automated backup solutions provided by the NAS help users schedule regular backups of their data, reducing the risk of data loss. This feature is invaluable for businesses and individuals who want to ensure their files remain secure without manual intervention.
What Are the Best NAS Options for Mac Users Today?
The best NAS options for Mac users today combine performance, compatibility, and user-friendly features.
- Synology DiskStation DS220+: This model is known for its user-friendly interface and excellent performance. It supports Time Machine backups seamlessly, making it a perfect choice for Mac users. With dual-core processing and expandable RAM, it can handle multiple tasks simultaneously without lag.
- QNAP TS-451+: This NAS offers a great balance between performance and storage capacity, supporting up to four drives. It features a versatile app ecosystem that allows for easy integration with macOS, and its HDMI output enables direct media playback on TVs. The QNAP TS-451+ also supports various backup solutions, including Time Machine.
- Western Digital My Cloud Home: Aimed at consumers looking for simplicity, this NAS is easy to set up and use. It offers a straightforward interface that works well with Mac, allowing for automatic backups and file sharing. Its cloud storage capabilities let users access their files from anywhere, enhancing its utility for on-the-go users.
- TerraMaster F2-221: This budget-friendly option provides solid performance with dual-bay storage and supports various RAID configurations. It is compatible with macOS for seamless file sharing and backup. The TerraMaster F2-221 also features a user-friendly interface and decent app support for multimedia applications.
- Asustor AS5304T: Designed for multimedia enthusiasts, this NAS features powerful hardware capable of supporting 4K transcoding. It offers excellent compatibility with macOS and comes with a variety of apps for media management. Its dual Ethernet ports allow for link aggregation, enhancing network performance for heavy users.
What Common Issues Should I Be Aware of When Choosing a NAS for My Mac?
When selecting the best NAS for a Mac, there are several common issues to consider that can affect performance, compatibility, and usability.
- Compatibility with macOS: Ensure the NAS you choose is fully compatible with macOS, as some devices may have limited support for Apple-specific features or file systems.
- File System Support: Look for NAS devices that support APFS or HFS+ file systems, which are optimized for use with Mac, as using an incompatible file system can lead to performance issues and file access problems.
- Backup Software Compatibility: It’s important to check if the NAS supports popular backup solutions like Time Machine, which is essential for seamless backups on macOS.
- Network Speed and Connectivity: Consider the network capabilities of the NAS, such as Ethernet speeds (Gigabit vs. 10GbE), and ensure it offers wireless options that can integrate well with your Mac setup.
- User Interface and Management Tools: Evaluate the NAS’s user interface, as a more intuitive management system can simplify configuration and day-to-day operations, especially for those less technically inclined.
- Security Features: Look for NAS devices that offer robust security features like encryption and user access controls to protect your data, especially if you’re storing sensitive information.
- Performance and Hardware Specs: Assess the hardware specifications, including CPU and RAM, as these will affect the performance of applications and file transfers, particularly when multiple users are accessing the NAS simultaneously.
How Can I Maximize the Benefits of a NAS with My Mac?
To maximize the benefits of a NAS (Network Attached Storage) with your Mac, consider the following strategies:
- Choose Compatible NAS: Select a NAS that offers seamless compatibility with macOS, ensuring features like Time Machine support and easy file sharing.
- Utilize Time Machine Backups: Configure your NAS to serve as a Time Machine backup destination for automatic and regular backups of your Mac.
- Enable File Sharing: Set up file sharing protocols such as SMB or AFP on your NAS to facilitate easy access and sharing of files across your network.
- Install NAS Management Software: Use the NAS manufacturer’s management software for easier configuration, monitoring, and accessing media files from your Mac.
- Utilize Cloud Sync Features: Leverage built-in cloud synchronization features of your NAS for remote access and backup capabilities to your Mac.
- Set Up Media Streaming: Configure your NAS for media streaming, allowing you to access photos, music, and videos on your Mac or other devices effortlessly.
- Optimize Performance Settings: Adjust settings such as RAID configurations and network protocols to enhance the performance of your NAS when used with your Mac.
Choose Compatible NAS: It’s essential to select a NAS that explicitly supports macOS to avoid compatibility issues. Look for features like Time Machine support, which allows for easy backups, and ensure that the NAS supports file formats and protocols that work well with macOS.
Utilize Time Machine Backups: Time Machine is a powerful built-in backup solution for Mac users, and setting up your NAS as a backup destination can provide a reliable way to secure your data. By doing this, you can restore files or even your entire system should a failure occur.
Enable File Sharing: Configuring your NAS for file sharing using protocols like SMB (Server Message Block) or AFP (Apple Filing Protocol) allows you to easily access and share files across multiple devices on your network. This setup is especially useful for collaborative work or shared media libraries.
Install NAS Management Software: Using the NAS management software provided by the manufacturer can significantly simplify the setup and management of your NAS. These tools often include user-friendly interfaces for file management, configuration settings, and monitoring system health.
Utilize Cloud Sync Features: Many NAS devices come with built-in cloud syncing capabilities, which enable you to access your files remotely and keep them backed up online. This feature is particularly useful for on-the-go access and ensures that your data is safe even if your local network goes down.
Set Up Media Streaming: By configuring your NAS for media streaming, you can easily access and enjoy your media collection directly from your Mac. This can include music, movies, and photos, which can be streamed through various applications, enhancing your media consumption experience.
Optimize Performance Settings: Adjusting performance settings on your NAS, such as selecting the appropriate RAID configuration, can optimize data redundancy and speed. Fine-tuning network settings based on your specific use case also helps ensure that your NAS operates efficiently in conjunction with your Mac.
Related Post:
